
This is pretty wordy, but I can’t think of any way to avoid it.
A user named Nyaalice asked for help with Yosuke Muroya’s Wolf by crease pattern on Reddit. The only comment (as of now) was something along the lines of “you should pay someone to help you”. Which is fine, I guess, but it seems strange in a subreddit with “Help!” flair.
That being said, it’s an odd model. The crease pattern and finished model image are both on flickr. It looks like something originally done by steps/diagrams rather than just collapsing a crease pattern. It usually takes luck to back-solve steps, so I can only do reference points/lines and tips for folding (the biggest two tips are at the end).


- Fold and unfold the diagonal, angle bisectors, and a diagonal that connects them (you can see it there).
- Fold and unfold the corner to the intersection shown (from the previous step), then to this new intersection.
- Fold the edges parallel to the center diagonal starting at the bisectors-edge intersections.

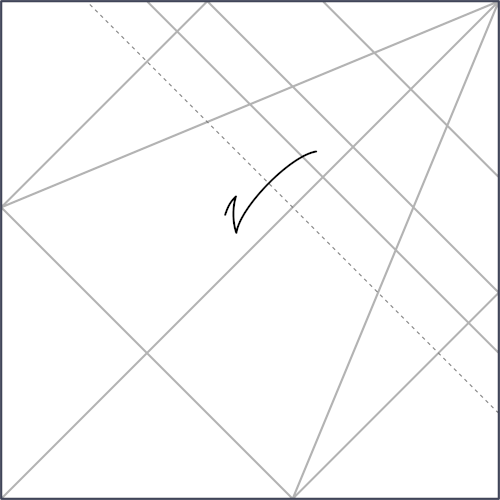

- Connect these previous two folds.
- This is a bit odd, but you can see the distance to the nearby parallel crease is the same distance as that one is to the next. I crimp the previous two then fold down to get it.
- Fold parallel creases (from 1 and 3) to align.
- Connect these intersections. This will mirror folds on the other sides of the folds from 6.
Those are the main reference creases; other lines are largely diagonal halves or quarters of some combination of these folds.
Finding where (most of) the creases are isn’t really the difficult part of the model though, so I have some tips on how to fold it. The model doesn’t specify its folds polarities (mountain or valley), so I want to clarify that my tips are at least somewhat subjective. Also, hope I’m not stepping on any toes by including sections of the original crease pattern.
First, some general tips:
- On his crease pattern, the head is the top right corner, and the tail is at the bottom left.
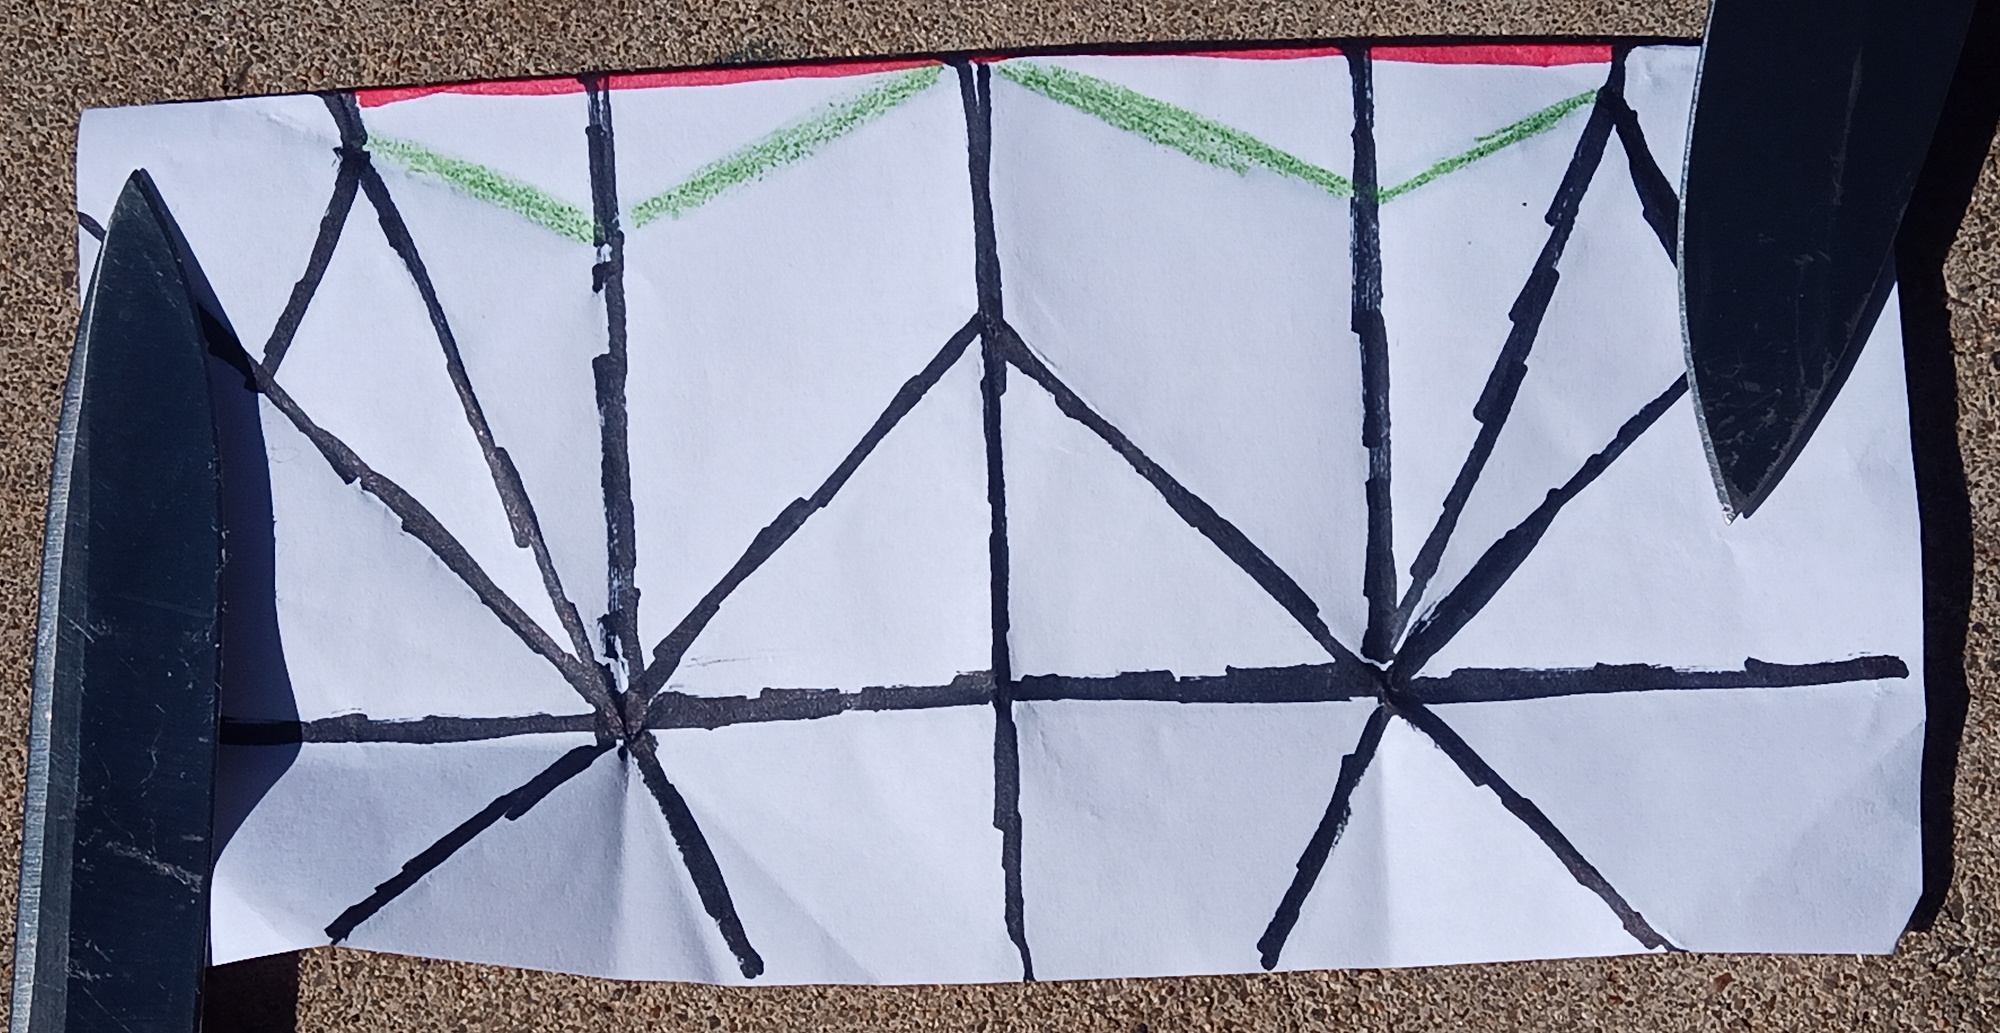
- Precrease all around the front legs and the just before the head (between the folds in my second precrease image) then unfold. Start collapsing from the back legs.
- The side flaps (precrease pic 3) can be folded under/inside and ignored.
- The tail and leg section need inside reverse folds/sinks to separate them. Conversely, the bisectors near the head should mostly be kept folded while the head is folded.
- I don’t exactly know how the tail is supposed to work, so I just winged that (wung? idk).
Biggest Tips:
In my opinion, there are two difficult sections in this crease pattern: The crimp near the center and the two “sinks” to the side of this.
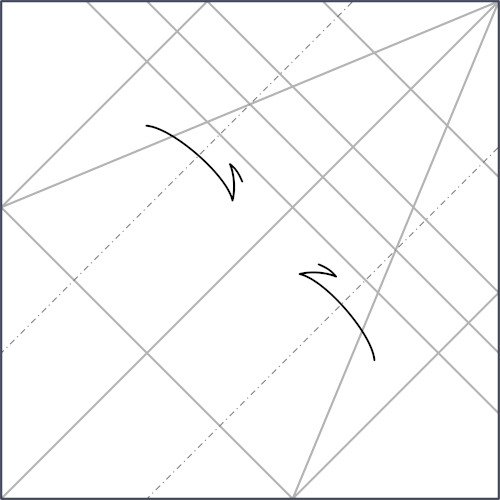
The Crimp:


It helped me to precrease this section separately before folding (either way, here’s the logic). For now, ignore the “sinks” to either side of this section. Fold the red lines as a crimp with the bottom and top ones valley folds and center as mountain. The head/neck starts as the double outside reverse fold of the green highlighted ones (I don’t know the exact placement but just ballparked them).
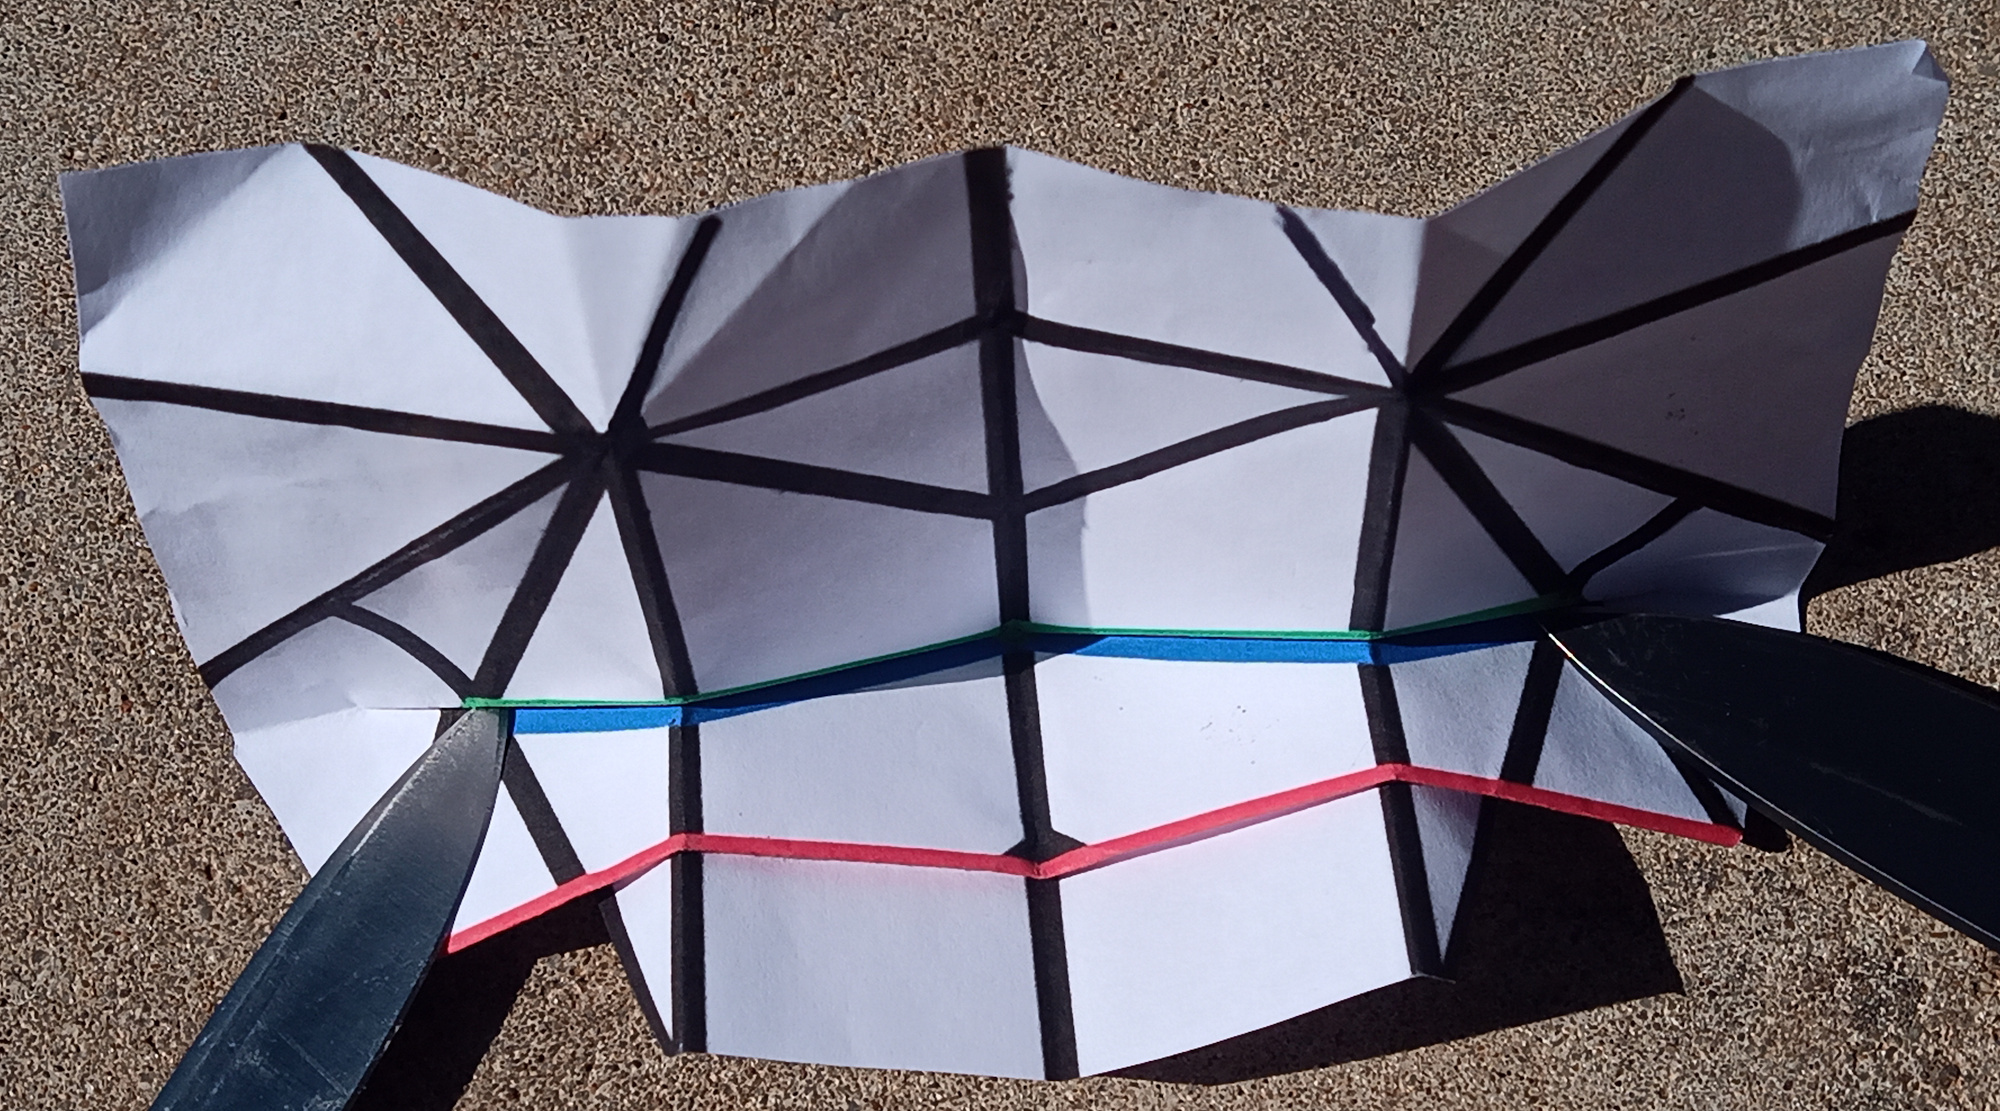

While doing the outside reverse fold, fold the center diagonal as a valley fold and the parallel ones to the sides as mountain. With this, the crimp section will line up with the body, but it will interfere with the rest of the model. The blue lines are actually one fold, a similar double outside reverse fold, to line it up with the neck and get it out of the way. This is why there’s a small square in the middle: when the head is folded back inside and out, the top of the crimp is folded with it.


The “Sink”:

Note the quotation marks. These look like traditional “sink in and back out” sections. However, they don’t seem to be (certainly not in a traditional sense). Rather, when you fold the body and legs, they don’t line up exactly with each other. These are initially folded in the center, and then folded back and forth as a group to line up the internal and external. I suppose this doesn’t sound too on the ball or whatever, but I folded the surrounding sections (first the tail and back, then the front legs, and then the internal crimp and neck) and just messed with the model a bit to get it to fit, assuming the internal would work out like the pattern. That’s probably not true, but there’s a good chance the original artist did the same initially.
It’s still tricky, but knowing how most of it works with some trial and error will hopefully produce a wolf.

Bloody hell, thank you very much! And I didn’t know you have a whole website dedicate to origami!
LikeLike
Oh, yes, sort of.
And sure, np, I hope you were able to make the wolf!
LikeLike